
^^^The scripted operation mode is made to achieve those special details, you could set the lift to the fairly new "idle on" speed when the next block is occupied with that.
All Comments
14661 to 14680 of 19728Filter comments

Great recreations. You might be interested in a FB group that was just created a few weeks ago. Its about Defunct Coaster Recreations. Someone on their has just done the Bobs at Riverview. I helped him out a little bit with it. Here is a link
^^ Really? I don't seem to have they issue with the visual difference, you have to do it right though. For a reference, I did it here https://steamcommunity.com/sharedfiles/filedetails/?id=778374925 it is possible to tell where one starts and the other ends, but you have to know what you’re looking for; it’s not painfully obvious (like some others I've seen...). Granted, if you don’t do it right and the catwalk tends to bug out a little bit and it does look kind of stupid, but if you keep the end of the lift segment from passing a certain angle, then the catwalk will use the vertical posts the whole way and you won’t be able to tell.
Anyone else going to ACE day at SFMM on the 8th of September?
You pretty much have the weird coaster market, Jetcoasterfan. Also, that link doesn't help at all because there's no art.
Giant Coaster Fuji-Q https://rcdb.com/2073.htm
I've been on a bit of an uninspired streak. Can't think of any coaster designs, styles or even names. So I've turned to re-creating defunct coasters.
My first was Cyclone Racer at Long Beach Pike. This Church-designed and Traver-built twin coaster operated from 1930-1968. I spent about two months to create it.

My second project was more difficult. It was the famous Cyclone at Crystal Beach, which ran from 1926-1946. This Traver coaster was considered the most intense ever built. It took me a few months to make this too. I did a lot of research and even had a large copy of the blueprints (thanks to my girlfriend, who has access to park archives and printed me a copy). It's probably my favorite recreation.

My third was a steel coaster, The Bat. This early suspended coaster at Kings Island had a short life span, 1981-1983. This coaster was especially difficult to research. I found a photo of an old brochure that showed the overhead layout and some photos from a few angles for supports. This was my most ambitious project and took about three months. After this, I had to take a break, not just from building but from NoLimits altogether.

My next project is going to be a bit easier. I've started the track work and have the specs pretty much correct. I have to work on the shaping of the inversion and get the length closer to accuracy before I start on the supports. This is Moonsault Scramble, the first coaster over 200 feet tall. It operated at Fuji-Q Highland in Japan from 1983-2000 and pulled a stunning 6.5 G's.

I have a few ideas for other defunct coasters to recreate, including Blue Streak at Woodcliff park and Bobs at Riverview. Overhead photos and layouts help the most when researching. If you have any suggestions, pointers or resources, I'd appreciate them. I'll update this as I work on Moonsault Scramble, unless I forget.
[Tutorial] LODs
Time for a mini-tutorial. Let's figure out the best way to LODs in Blender, first for simple objects, then complex multi-part objects. This information might be useful to you if, for instance, you've decided to make a completely custom track mesh for your project, ahem.
A simple example
Confusing note: The term "Object" refers to a different level of the scene hierarchy in Nolimits 2 and Blender, so below I'll use "NL2SCO" for Nolimits, and "object" for Blender.
As a quick demonstration, I created the default Suzanne object, and created two copies which have applied subdivision modifiers. I've named the highest-polygon mesh suzannetemplate_lod0, and the lowest suzannetemplate_lod2.

If you've tried using LODs in Nolimits before, you may have noticed how fussy the system can be. Each LOD file needs to have the same material list, and more irritatingly, each file needs to have the same name for each object.
Blender doesn't allow duplicate names for objects, so what I've done in the past, and what I imagine most people do is rename one object to its final name, save the DAE file, revert that change then rename the next one, etc. Luckily, and as always, Blender has yet another feature you haven't learnt to use yet that will make this process simpler.
On the right panel, go to the Data tab. This tab has a bunch of useful features you may have used before; auto smoothing, UV maps and vertex colours. We're interested in the easiest thing to miss, the box at the top.

Every object in blender contains an object data, in most cases a mesh, which is actually a separate entity from the object itself. This is a little unintuitive, which is probably why you glossed over this as you were learning Blender, but this is how blender handles object instancing. As an example, if you wanted to duplicate a tree object 1000 times to make a blender scene, if you just Ctrl+D'd them all your .blend file might be 1000 times larger. If you set the mesh for each of the objects to same, the .blend wouldn't have to store any more mesh data at all.
Rather than using this feature to duplicate objects, we'll use it to quickly swap between LODs. Start by giving each objects' mesh a memorable name. I selected each object and copied the name to the object data. It's also a good idea to click the F (Force) flag, which will stop the mesh data from being deleted.
Now, we'll create a new object, a cube will do. Then, you simply go to the data tab, and use the browse button on the left and select one of the suzanne LODs.

Now to export this ready for NL2, we just select our new object and export the first LOD (as suzanne_0.dae), then change the object data for the next LOD , and save that (as suzanne_1.dae), etc. We don't need to worry about object names, we've only exported one object.
Okay, it's a subtle improvement in workflow for this simple object. On a more complex object, we can really save some time...
Custom coasters
I've hastily made this track model based on lighting run. As a stress test (and a poor example of layout/coaster type fit) I've replaced the track of the library coaster Spinemelter 3000 with it.

A quick guide on how to make this kind of mesh: First create your desired track model in this top-down orientation:

Import a track CSV file from Nolimits 2 Pro into Blender. Add an array modifier and curve modifier to the track object. Set the array to fit curve and select the curve object in the relevant boxes in each modifier:

Great! but when I try this with my high-detail track, it totals at 650,000 polygons! Even full desktop GPUs struggle with more than a few million polygons, so we've taken up a really significant portion of our total polygon budget, and on lower-spec systems we've probably already lost that ideal 60fps target with nothing else in our park. Time to add LODs for the track.
Remove the modifiers and duplicate the track pieces. Use these to create your LOD template objects for the track. You'll want to reduce polygon counts by reducing the sides in the cylinders and curved surfaces, but also varying the subdivisions along the length of the track tubes. I went from 0.5m segments in the highest to a full 4m segment in the lowest. I ended up with 4 meshes, with polygon counts of 1620 (this is pretty high, but provides a good worst case), 740, 388, 24.

Same as before, give each objects' object data a useful name, and enable the force flag. As before, we'll create a new cube object, and set the data to one of our LODs. Add the array and curve modifiers back.
We can't just create LODs for a single track mesh, otherwise we can only swap to the low poly mesh when we're nowhere near the coaster. We need to create the track in sections, so each one can be swapped. (if you're stood at one end of the coaster, the other should be low-poly)
So instead, use a fixed count for the array length. My track model is 4m in length, so I've set the length to 8, for a 32m section. Duplicate this by pressing Ctrl+D, then press x, and type 32 and press enter to move it exactly 32m along the track curve.

Repeat ad nauseum. The shorter the sections the less noticeable the LOD swaps can be made, but if you have too many objects you'll get slowdown on the CPU side as NL2 tries to handle all the objects. For my hyper coaster I needed 44 segments, which is fine, I probably would have been fine halving the segment length and using 88 objects.
When you duplicate an object, blender likes to duplicate its data too, which we don't want. Hide the template objects if you haven't already, then select all your track pieces (Select > Select Pattern... is useful for this) and object data for the active object to the correct template data, then apply this to all the other selected objects by pressing Ctrl+L and selecting Make Links > Object Data.
Double check that each object is now using the same data.You can check this step by saving then reloading your .blend file, all of the duplicated data should be removed from the list now.
Our first LOD is complete. Select all of the objects, and export to track_0.dae. Then, change the object data to the next LOD and repeat the Make Links > Object Data step, export as track_1.dae, etc.
The LOD system in NL2 is really well implemented. You might think that LODs are a per-object thing, and to separately switch LODs for 44 track segments we'd need 44 NL2SCO files, but the LODs are selected for each sub-object independently, the engine will load LODs from all the DAE files at once, if needed.
Set up your NL2SCO as normal, guessing some sensible LOD distances, and view the park with LOD Distance setting set to the minimum to exaggerate the effect. Close track segments are displayed in full detail, whereas distant segments are at minimum detail.

As for performance, I tested at the same position with different LODs and got these results:
- High poly only (650,000) - 123fps
- Low poly only (14,000) - 135fps
- Final Model (variable) - 135fps
A small difference, but looking at it another way, we're able to 630,000 more polygons to our scene with no performance impact at most positions.
2am edit: oh god this wasn't mini at all!
Nope!
I think this is really cool and am using it in my current project. I've noticed though that objects that move along a track, always stay oriented in the same direction. How difficult would it be to modify so that the orientation of the objects matches that of the track (like when coaster cars move along a track). I attempted to modify it myself, but I'm not sure how to extract the rotation information out of the track position matrix.
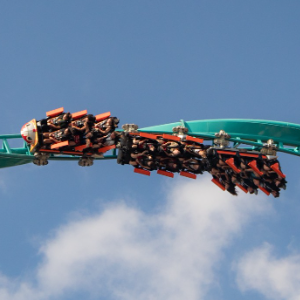
Karacho?

Yes! Took this picture in July shortly after the ride made it last round for the day
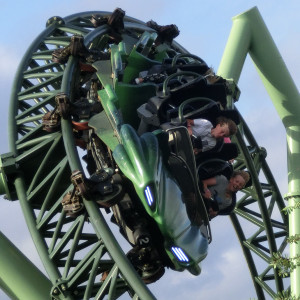
Robin Hood @ Walibi Holland?

Will the new trains have a download? I realy want to use them on a coaster i made
After the announcement of the winners you can make your video public. Until then the video must remain unpublished and hidden.
When we get closer I'll post a link to the entry form.
-Ride_Op

^^^ I'll make sure the coaster I'm working on now has straight brake runs and the recommended prefab preset type.
^ The European Coaster Club has an official invitation for an opening event on the 10th, so unless they do soft openings I wouldn't get your hopes up.
Yeah I upload my photos to imgur, I was surprised they got views after around 5 mins :P
Think that I'm just going to change the ride experience of Expedition Escape a lot, haven't published it yet. Or when I get inspiration I'm going to make something new (and when I have the time for it).
For the video: It may be published at Nov. 18 or?
14661 to 14680 of 19728