Jetcoasterfan posted on September 18th, 2020
He needs to battle me to see who can use custom support the best. Has he seen this?


!https://i.imgur.com/pEQ6BrX.png
show off

Jetcoasterfan posted on September 18th, 2020
He needs to battle me to see who can use custom support the best. Has he seen this?
show off
a few videos of my creation of F.L.Y. (version september 2019)
BossAct, I'm just saying...there's actually a plan overlay available online...did you use it? I'm still skeptical of the pullover shaping, thought that wouldn't show up on the plan of course.
no, no im not ready
So I have come up a idea for u guys to show off your coaster but with art detail like this for example.
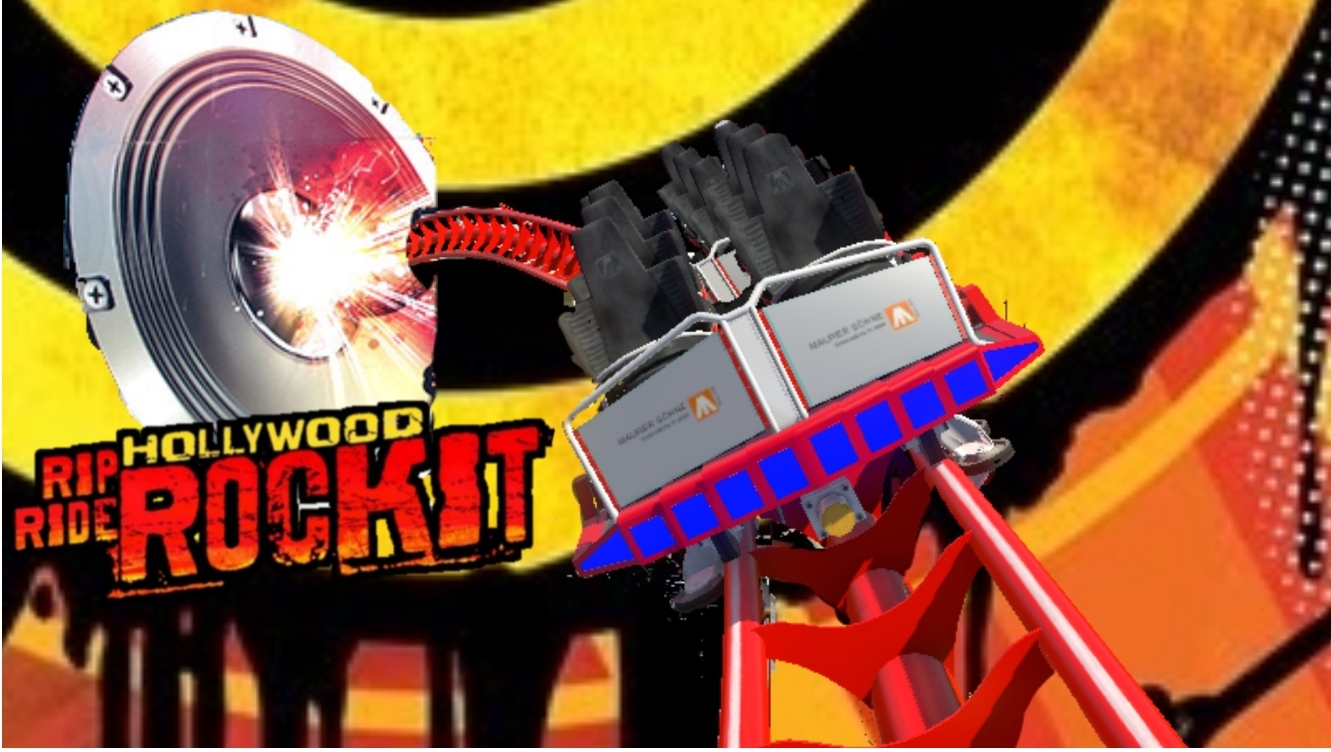
so are you ready
I've been working recently with the export data from NoLimits 2, however I'm struggling a little at converting the vector values (That is to say, [FrontX/FrontY/FrontZ][LeftX/LeftY/LeftZ][UpX/UpY/UpZ]) for rotation data into angles, as each value seems to inadvertently affect all of the other values - does anyone know / have any experience with how I could "decode" them?
fintamin posted on August 19th, 2020
Made a new table, this time it's rail diameters!
do u have a main spline information chart
He needs to battle me to see who can use custom support the best. Has he seen this? !https://i.imgur.com/pEQ6BrX.png
raptoralex posted on August 25th, 2020
What do you mean? This community builds realistic coasters and it's online.
well the simulation is kind like in realistic and make recreation coasters and this community is online so he has a point
JP posted on September 13th, 2020
That's looking really nice, welcome back!
who?
There is no confirmation or even a graying out of the "save" button when you do it, which makes it difficult. What you have to do is save as. Save it in that park's folder so it's easier to find. Then go to the "Park" tab and click "Environment." At the top there is a button with three dots. Click on that and select the environment you just saved. Close the environment window and save your park.
Here's the part that makes it show up: Close your park and reopen it. Then it should be there. The trick is you have to reopen the park. Changes to the environment don't show up unless you do that.
Desperately in need of a quick pointer (or bash on the head!)... I'm learning a little more of NL2 each day, but today I've hit a wall. No lie - 2 hours and still going round in circles! Thought I'd change the "Environment Editor" screen (for the first time). It won't accept my changes. It makes out it has, even asking "Sure you want to overwrite?" (which I accept), but next time I come back to it, the old values are still there. (Btw, I always come RIGHT out of NL2, so it will take effect.) I've also tried changing the top line ("Path") by making it point to a whole new library, and it lets me "Save" it, but again, it has no effect next time I go in. I've read the help instructions etc. till I'm blue in the face, but there just seems to be something really basic here that I'm missing! HELP!
woah hes alive
IE Park has two PDF on their website featuring a plethora of layouts, both existing and in development (like a launch coaster using the LEM technology)
Roundup, man
I don't wanna list you, 345
I get my rides in
'Cause I'm an enthusiast
5 weeks remain until Roundup 350!
You create it, you share it, we feature it!
-Ride_Op
This guide was made to help you get started in FVD++.
We'll start at the basics and work our way up to advanced elements.
THIS GUIDE WILL NOT BE GOING INTO MANUFACTURER SPECIFIC SHAPING
If you think anything is missing from this guide or you have any questions be sure to let me know and I'll respond. I try to be as active as possible and answer all questions you may have. (PS there are no dumb questions)
Important note:
If you get stuck in fullscreen, press f.
First, we'll get to know the basic FVD++ interface.
I recommend you take your time and explore all the buttons and what they do.

In the middle is a giant viewport, to look around in it, right click inside the viewport and use WASD to move around.
On the left, there's a big list of tracks (currently only showing 1 "unnamed Track") with options for those tracks at the bottom left.
At the top left, you can add a ground texture, this is used mostly for reference when trying to do recreations.
(guide to make accurate overlays can be found here )
You can add more tracks by pressing add in the bottom left.
When you double click "unnamed Track" you can give the track a name, this is handy when making projects with multiple coasters.
At the top left, under edit, you'll see options. If you click on it this menu will open up.

The top options are clear, the bottom options change the colors of the graphs when using Force or Geometric sections.
Next to edit, you'll see visualize, if you choose one of the options it will change the color of the track to "visualize" the forces and other at that point on the track.
If you select a track and click properties in the bottom left, you'll be met with this window:
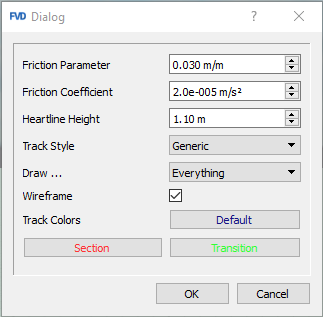
Here you can change the friction (friction guide is here),
the heartline (only vertically, sadly not horizontally heartline graph when),
the track style and the wireframe (basically always turn this off) and some more options you'll probably never use but are very self explanatory.
If you select a track and press edit, the interface will change to this:

In the top left you can see that a new tab has opened with the name of the track you had selected.
On the left, the list of tracks has now changed to a list of track sections, this will now only show the anchor. The anchor is the point where the first piece of track starts.
If you have the anchor selected you will see these options appear at the bottom of the list.

These represent the location on the XYZ axis,
the rotation on the XYZ axis, the initial speed and at the bottom you can set starting vertical and horizontal G-forces or below them you can change the same in degrees per second.
Now, to create a piece of track, press the add button at the bottom of the track section list. This will give you 4 options:
Simple straight piece where you can set the length and speed.
Simple turn where you can set the speed, radius, total angle, direction and lead in/out.
The main things here are the direction and the lead in/out.
The direction decides which way the curve goes: 90º is a left turn, -90º a right turn, 0º makes it go straight up like the bottom of a lift and 180º makes it go straight down like the crest of a lift.
If you for example set the direction to 45º you get this:

Lead in/out is exactly what it sounds like, it transitions into and out of the turn radius at the end of a turn. This is set in º, meaning the last x amount of degrees will slowly transition from yº/meter of track to 0º/meter of track.
Adding a force section will show this graph at the bottom of the screen.

Here you can see a blue graph (represents vertical g-force),
a red graph (represents roll speed in º/s) and a green graph (represents lateral g-force).
The numbers on the left side of the graphs window represent rollrate,
on the right they represent the total g-forces and at the bottom they represent the time passed.
The start and end of the visible track are marked by vertical dash-dotted lines.
The end of the visible track will always be at the end of the shortest graph, in this case the red graph:

To the left of these graphs you can see the settings that allow you to edit the transitions.
(slightly above these settings you can set a fixed speed and right above that, you can change the Orientation (you dont really need to touch this ever but if you wanna know what this does i recommend you watch this video) and if the transitions should be based on time or distance
(º/s vs º/m)

At the top of these settings you can set the length (seconds/meters depending on what you selected above).
Right under that, you can change the type of transition and by how much it should change (g-force).
Some of the transition types also have some special options which should appear right below the transition type selector.
The types of transitions are:
---linear

---Quadratic (symmetric function)

Quadratic (blend in)

Quadratic (blend out)

---Cubic

---Quartic (Symmetric function)

Quartic (Opposite direction first)

This special option has its own counter you can change that will make the beginning of the transition lower, example:

Quartic (Overshoot final value)

This has the same counter as the transition above but instead of lowering the graph, it makes it higher:

---Quintic (Simple transition)

(This transition looks very similar to the cubic graph but is slightly different)
Quintic (doubleBump 1 and 2)

Bumps one way first, then the other. The counter here changes how much it bumps one way (it'll bump the other direction more, or less).

DoubleBump 2 does the exact same thing but instead of bumping up first and then down, it bumps down first and then up.
---Sinusoidal

Another simple transition very similar to the cubic and quintic graphs.
---Plateau

Below these, you can change the center and tension of the transitions. These will be here for all transition types.
Center
Without any changes:
Center set to +1:

**Tension
Without any changes:
Tension set to -2:

All the way at the bottom there are 3 more options:
Append
Adds a transition after the currently selected one.
Prepend
Adds a transition before the currently selected one.
Remove
Removes the currently selected transition.
Take all of the explanations above, but instead of changing the g-forces with the transitions, it changes the degrees.
Above the graph editor you can see a bunch of statistics:
(click if too small)

These represent the statistics at the ending of the current track or if in pov mode* the section you're currently at.
From left to right these represent:
X, Y and Z position
Current roll and rollrate
Current pitch and pitchrate
Current yaw and yawrate
Speed
Vertical acceleration
Lateral acceleration
*You can enter the pov mode by right clicking inside the 3d viewer and pressing space. Move forward and back using WS, shift and ctrl.
Exiting works the same way.
That's it for the intro into the FVD++ Bible. Let me know if you want more of this and if there are any specific elements you want to see.
In part 1, we'll see how the graphs affect the track.
Thanks JAKool for the feedback
100 Gecs saved music
Heres my jam: https://youtu.be/J0DjcsK_-HY
Yeah, i listen to weird music.
hi i'm doing a maverick recreation take 2 cause the last one went to sh*t so i wanna know what to do to make it a bit easier?